

Last Updated: November 7, 2026
Quick Summary
The safest way to change your helmet visor color is to replace the visor with a shield made for your exact helmet model. Tint film is cheaper but hard to remove cleanly, while a matching replacement shield gives you a clean fit and consistent optics for your helmet visor color.
- Check your helmet's brand and model on the inside before buying any shield.
- Replacement shields give the cleanest look and the most consistent optics.
- Tint film is the cheapest option but is hard to remove and can trap bubbles.
- Avoid dark or mirror tints for night riding, since they reduce visibility after dusk.
- Test any new tint indoors and at dusk before relying on it on the road.
Table of Contents
- Check Whether Your Visor Can Be Changed
- Compare Tint Film, Removable Tint and Replacement Shields
- Choose a Color That Keeps Your Visibility Safe
- Step-by-Step: Applying a Tinted Visor Film Without Bubbles
- Using a Helmet Visor Tint Sticker Safely
- How to Remove Tint From a Motorcycle Helmet Visor
- Pick Your Replacement Shield and Ride Safely in Any Light
- Frequently Asked Questions
Check Whether Your Visor Can Be Changed
Before you buy anything, check what your helmet is built to accept. Many visors are sold as a single piece with the shell, and many helmet makers design their shields to fit only specific models. Look for the model name and year on the inside of the helmet, then check the manufacturer's listing for the shield that fits it.
This check matters because a visor that does not seat correctly can leave gaps, rattle at speed, or change how your view looks through the eye port. At The Helmet Shop, we list replacement shields by the helmet they are made for, so you can match the part to your model before you order.
Start by answering three questions about your helmet before you choose a helmet visor color:
- What is the exact helmet brand and model?
- Does the shield attach with a quick-release system or tear-off posts?
- Is there a pinlock-ready option for anti-fog protection?
Compare Tint Film, Removable Tint and Replacement Shields
There are three common ways to change how a visor looks. Each one has a different cost, effort level and result.
Tint film is a thin adhesive layer you apply to the inside or outside of a clear visor. It is the cheapest route, but it is hard to remove cleanly and can trap bubbles. Removable tint works like a clip-on overlay and is easier to swap out. A full replacement shield gives you the cleanest look and the most consistent optics. If you want a ready-made alternative, you can view the gloss black bubble visor directly.

For most riders, a replacement shield is the lowest-risk option. Photochromic replacement shields for the Daytona Legacy, for example, darken in sunlight and clear in shade, so you do not need to swap visors as conditions change. You can also browse a smoke tinted bubble visor if you prefer a fixed tint.

| Option | Typical Effort | Best For |
|---|---|---|
| Tint film | Moderate, needs care | Budget color changes |
| Removable tint | Low | Riders who change tints often |
| Replacement shield | Low | Clean fit and consistent optics |
Choose a Color That Keeps Your Visibility Safe
Visor color changes how much light reaches your eyes and how well you see road details, so the helmet visor color you pick affects both comfort and safety. If you are still weighing the helmet itself, read how to choose the safest motorcycle helmet. The two variables that matter most are tint darkness (how much light the shield blocks) and color contrast (how different wavelengths affect edge detection and depth perception).
Tint darkness is often described as a percentage of visible light transmission (VLT). A clear shield transmits most available light. A lightly tinted shield blocks some glare while keeping contrast high. A dark tint blocks more light and can make road edges, lane markings, and debris harder to see at dusk, in rain, or under heavy overcast. A dark tint works well in direct sun but becomes a liability as ambient light drops.
Color also matters. Gray and smoke tints reduce overall light without shifting color perception, so they are a neutral choice for mixed conditions. Brown and amber tints increase contrast in flat light and can help with depth cues, but they shift how colors appear. Mirror finishes reflect glare and look aggressive, but the mirror coating sits on top of a tinted base, so the underlying darkness still governs how much you see. Blue and green tints are largely stylistic; they do not offer a consistent contrast advantage and can make some road surfaces look flatter.
Photochromic shields handle this trade-off automatically. They respond to UV light, so they darken in full sun and lighten in shade or overcast weather. That makes them a practical pick for commuters who ride from daylight into evening, or for riders who pass through tree cover and tunnels. Photochromic shields in general darken and clear without a swap.
If you prefer a fixed color, choose a shade you can still ride in after sunset. A mirror or dark tint is a poor choice for night riding. Test any new tint in both bright and dim light before you rely on it on the road. A simple check: put the shield on indoors under normal room light, then step outside at dusk. If you cannot clearly see the texture of the road surface or the edge of a curb, the tint is too dark for that light level.
Watch out: a tint that looks fine in a parking lot can hide potholes, wet patches, or a cyclist at the edge of your view once you are moving. Peripheral vision matters more than the center of the eye port, so check that the tint does not create a dark band or distortion near the edges of the shield.
Step-by-Step: Applying a Tinted Visor Film Without Bubbles
Applying tint film takes patience. Rushing the job is the main reason riders end up with bubbles, wrinkles and a crooked edge.
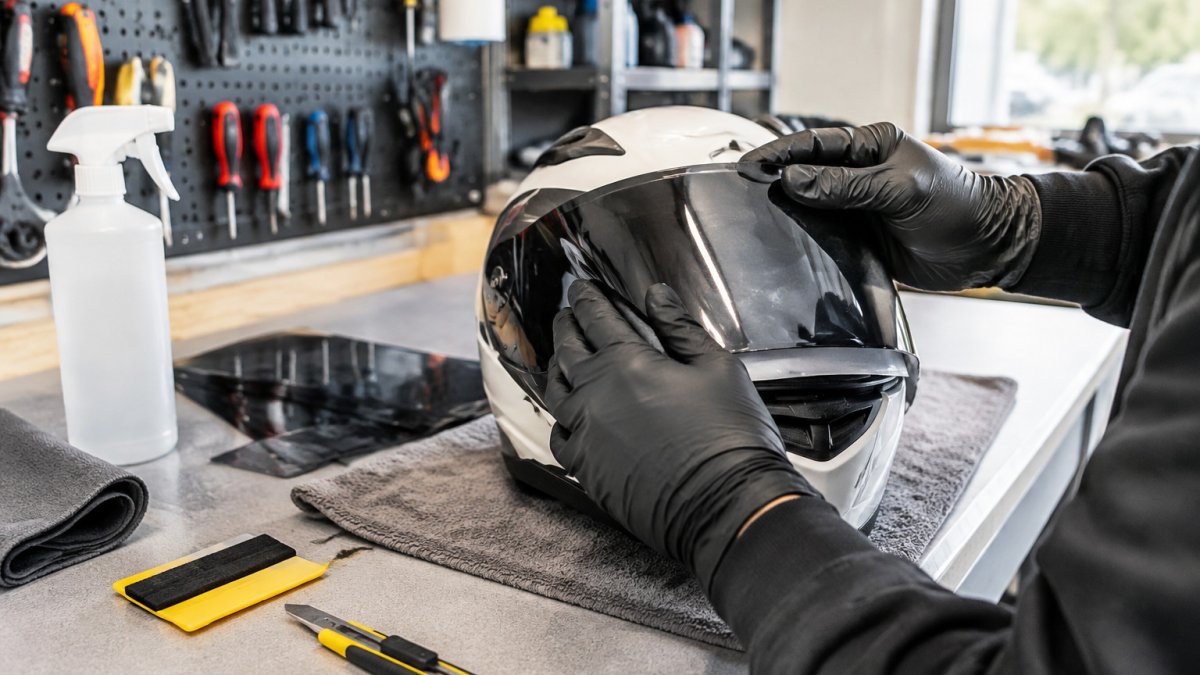
- Clean the visor. Wash it with mild soap and water, then dry it fully. Remove any oil or dust, because even small particles will show under the film.
- Cut the film slightly larger than the visor. Leave about a quarter inch of extra material around the edge. You will trim it to fit later.
- Wet the surface. Spray a light mix of water and a drop of soap on the visor. The wet surface lets you slide the film into place and fix small mistakes.
- Peel and place. Remove the backing and lay the film on the visor. Start from the top edge and work down.
- Smooth from the center outward. Use a squeegee or a soft card to push water and air toward the edges. Work slowly.
- Trim the edges. Once the film is dry, trim it to the shape of the visor with a sharp blade.
- Let it cure. Leave the visor undisturbed for 24 hours so the adhesive can set.
A common mistake is skipping the cleaning step. Dust under the film looks like a bubble and cannot be fixed without redoing the job.
Using a Helmet Visor Tint Sticker Safely
Tint stickers are a quick way to add a color band or accent without covering the whole visor. They are popular for style, but they sit in your line of sight, so placement matters.
Keep any sticker out of the central viewing area and off the bottom edge where it can catch wind or peel. Never place a sticker over the eye port itself, since it can reduce clarity and create a hazard at speed.
Check your stickers regularly. Heat, UV exposure and cleaning products can loosen adhesive, and a peeling sticker can flap and distract you while riding.
How to Remove Tint From a Motorcycle Helmet Visor
Removing tint film takes time, but it can be done without damaging the visor if you go slowly. The goal is to lift the adhesive without scratching the shield or pulling up the anti-scratch coating that sits on the surface.
Warm the film with a hair dryer on low heat. This softens the adhesive so the film lifts more easily. Keep the dryer moving and do not hold it in one spot, because concentrated heat can warp a polycarbonate shield or soften the coating. Peel from one corner at a shallow angle, and stop if the film tears into small pieces instead of coming off in one sheet. If it tears, re-warm that area and try again rather than picking at it with a fingernail.
Once the film is gone, remove any leftover adhesive with a gentle adhesive remover or a soft cloth and warm soapy water. Avoid harsh solvents and abrasive pads, since they can scratch the visor coating and reduce optical clarity. A common pattern is to use a plastic scraper or the edge of a credit card wrapped in a soft cloth to lift stubborn adhesive, rather than a metal blade.
After removal, inspect the shield in bright light. Look for scratches, haze, or patches where the coating has lifted. If the visor shows scratches or haze after removal, consider replacing it instead of trying to restore it. A worn shield affects how well you see, which matters most when conditions change quickly. Tinting or restoring a shield that already has cracks, deep scratches, or a failing coating is not worth the risk; the optical distortion can be worse than the tint you removed.
Watch out: some tint films leave a residue that reacts with the visor coating over time, especially on older shields. If the surface feels tacky or looks cloudy after cleaning, the coating may already be compromised, and a replacement shield is the safer choice.
If you remove tint and decide you want a different look, a replacement shield gives you a clean, consistent result without the adhesive cleanup. Match the shield to your helmet model and check for features like anti-scratch coating and pinlock readiness before you order.
Pick Your Replacement Shield and Ride Safely in Any Light
A replacement shield is the most reliable way to change visor color without the cleanup. Choose one that matches your helmet model and offers the features you need. Look for an anti-scratch coating, a pinlock-ready design for fog control, and a tint that suits how you ride.
The Daytona Legacy photochromic shields are a strong option if you ride in changing light. If you want a ready-made tint instead of film, the replacement shield route saves time and gives you a consistent result.
Before you order, confirm the fit against your helmet model. Once the new shield is installed, test it in daylight and at dusk. Make sure you can see clearly and that the shield seals properly. A short test ride in a quiet area before you head out on busy roads is a sensible step.
Ready to pick the right visor for your helmet? Browse the full range of replacement shields and tint options at The Helmet Shop, and choose a shield that fits your model and the way you ride.
Frequently Asked Questions
Is it possible to tint a motorcycle helmet visor?
Yes, many visors can be tinted with a removable film or a tint overlay, but not every visor accepts a finish safely. Check the manufacturer's guidance for your helmet model first. Visors with an anti-fog insert, a Pinlock-ready design or a photochromic coating may react badly to adhesive or solvents. Apply tint only to a clean, undamaged shield, and keep the result light enough that you can still see clearly at night and in changing light. If you are unsure, a replacement shield in the color you want is the simplest option.
Should I use a tinted visor at night?
Usually not. Dark tints reduce the light reaching your eyes, which makes it harder to see road edges, pedestrians and hazards in low light. A clear or lightly tinted shield is the safer choice after dark. Photochromic shields adjust automatically between bright sun and shade, so they can be a practical option for riders who move between daylight and dusk. Plan to switch to a lighter shield before sunset, especially on unfamiliar roads.
Which color visor is best for a helmet?
The best color depends on the light you ride in most. Clear shields suit night riding and overcast days. Smoke and light tints help in bright sun without cutting too much light. Mirror and colored finishes reduce glare but can make the view darker, so they work best for daytime riding. Photochromic shields such as the Legacy Shield Outer in Photochromic Blue, Green, Gold, Pink or Red, priced at $80.95, change with the light, which suits riders who face changing conditions.


