

Last Updated: October 29, 2026
Quick Summary
Cheek pad fit is how the padding on the sides of your helmet presses against your cheeks and jaw. To check it at home, seat the helmet, then shake your head, nod and open your mouth wide, watching for pads that slide or pinch. The cheek pads should feel firm and even without hurting.
- Cheek pads should feel firm and even on both cheeks, with light pressure all the way around.
- Shake your head side to side; the helmet should rotate less than about an inch at the brow.
- The helmet should move your cheeks when you turn your head, but not move when you chew or talk.
- If the helmet still moves at the crown, fix the shell size first, then adjust the pads.
- Replace cheek pads when they flatten, tear, or stop holding their shape.
Table of Contents
- What Cheek Pad Fit Means and How It Differs From Overall Helmet Fit
- How Tight Should Motorcycle Helmet Cheek Pads Be?
- Motorcycle Helmet Fit Test: Step-by-Step Cheek Pad Check
- Finding Motorcycle Helmet Pressure Points and Hotspots
- Troubleshooting Uneven or Loose Cheek Pads
- How to Replace Motorcycle Helmet Cheek Pads
- Booking a Fit Check Before You Ride: Your Next Step
- Frequently Asked Questions
What Cheek Pad Fit Means and How It Differs From Overall Helmet Fit
Cheek pad fit is how the padding on the sides of your helmet presses against your cheeks and jaw.
Think of the cheek pads as the part that does the holding. When they sit snug against your face, the helmet stays put when you turn your head.
Quick difference:
- Overall fit: Is the shell the right size for your head?
- Cheek pad fit: Do the side pads make steady, even contact with your cheeks?
Many riders focus only on the shell size. Check the cheek pads too, because they often decide how the helmet feels on the road.
How Tight Should Motorcycle Helmet Cheek Pads Be?
The cheek pads should feel firm and even, with light pressure all the way around. They should not feel loose, and they should not hurt.
Here is a simple way to judge it:
- Snug: Gentle, steady pressure on both cheeks. Good.
- Too loose: The helmet moves when you shake your head. Bad.
- Too tight: Sharp pressure, numbness or a headache after a few minutes. Bad.
Most riders need a little time to adjust. A new helmet often feels tighter at first and loosens slightly as the padding settles. Don't assume a painful fit will get better on its own.
Motorcycle Helmet Fit Test: Step-by-Step Cheek Pad Check
You can run this test at home in about five minutes. You will need your helmet, a mirror, and a friend if you can get one. The goal is not just to feel whether the helmet is snug, but to judge cheek contact, jaw movement, and helmet rotation the same way every time so you can compare helmets and pad changes consistently.
Before you start
- Fasten the chin strap snugly, the way you would ride.
- Remove glasses, hats, and anything bulky in your pockets that changes how you sit.
- If you have long hair, tie it back so it does not pad one side of the helmet.
The five-part cheek-pad test
Run these in order and note pass or fail for each. A helmet that fails any part is not ready to ride.

-
Seat the helmet and check initial contact. Pull the helmet on by spreading the base of the shell outward, then settle it so the brow line sits just above your eyebrows. The cheek pads should press against your cheeks and jaw immediately, with even contact on both sides. Pass: firm, even pressure on both cheeks. Fail: one side noticeably lighter, or the pads barely touch your face.
-
Check rotation with a side-to-side shake. With the chin strap fastened, shake your head left and right at a moderate speed, like you are saying no. Pass: the helmet rotates less than about an inch at the brow and the cheek pads stay in contact with your face. Fail: the shell slides across your forehead or the cheek pads lift away from your cheeks.
-
Check fore-aft movement with a nod. Nod up and down several times. Pass: the helmet stays seated and the cheek pads do not slide down your jaw. Fail: the helmet tips forward or back, or the pads ride up over your cheekbones.
-
Check jaw and mouth movement. Open your mouth wide, close it, and shift your jaw side to side. Pass: the pads hold firm and you feel light pressure that does not pinch, and your teeth do not catch the inside of your cheeks. Fail: sharp pressure, numbness, or the pads push your jaw sideways.
-
Check symmetry in the mirror. Look straight ahead in the mirror and have your friend check from the side. Pass: both pads sit at the same height, sit flat against the cheek, and the helmet sits level on your head. Fail: one pad sits higher, one side gaps, or the helmet tilts.
What the results mean
- All five pass: the cheek pads are doing their job. Move on to the pressure-point check below to confirm there are no hotspots.
- Rotation or fore-aft fail: the pads are too loose or the shell is too large. Try a thicker pad set first, then reassess the shell size.
- Jaw or mouth fail: the pads are too thick or sit too high. Try a thinner pad set or reseat the pads.
!A rider in a riding jacket standing in a driveway, seated firmly in a full-face helmet, hands resting near the chin strap while checking cheek contact in a mirror
Finding Motorcycle Helmet Pressure Points and Hotspots
A pressure point is a spot that presses harder than the rest. A hotspot is a spot that gets sore over time.
Common places to check:
- Cheekbones: Pressure here often means the pads are too thick for your face.
- Temples: Pressure here can point to a shell that is too small.
- Jaw: Soreness here can come from a cheek pad that sits too high or too low.
If you feel a hotspot, stop and check the fit before the next ride. Small changes in pad thickness often solve it.
Best for: Riders with a round or wide face who feel pressure at the cheekbones. Skip if: You only feel pressure on the crown.
Troubleshooting Uneven or Loose Cheek Pads
Uneven or loose cheek pads are usually one of four problems: a pad that is not seated, a pad of the wrong thickness, a mismatched left and right pad, or a helmet whose interior shape does not match your head. Work through these checks in order so you fix the real cause instead of buying pads you do not need.
Step 1: Confirm the pads are seated and matched
- Remove both pads using the snaps or tabs the maker specifies.
- Check the labels. Confirm the left and right pads are the same thickness and are the correct part for your exact helmet model and shell size. A common mistake is mixing a pad from a different shell size, which changes how the pad sits.
- Reseat each pad and press until every snap or tab clicks. Run your finger along the edge to feel for a gap.
- Recheck in the mirror. Both pads should sit at the same height and sit flat against the cheek.
If one pad sits higher after reseating, the pad or the shell channel may be damaged. Compare the two pads side by side; a bent tab or torn snap is a replacement signal.
Step 2: Decide whether the problem is thickness or shell size
This is the step most riders skip. Thicker cheek pads can tighten the lower face, but they cannot fix a shell that is the wrong size for your head.
- If the helmet passes the crown check but fails the cheek test: the shell size is likely correct and the pads are too thin. Try a thicker pad set.
- If the helmet moves at the brow, tips forward, or lifts at the back: the shell is likely too large. Thicker pads may reduce movement but will not correct a shell that does not match your head. Compare helmets with a different interior shape or a smaller shell size.
- If one side is loose and the other is tight: check for facial asymmetry, a pad that is not seated, or a mismatched pad. If the pads are matched and seated, a fitter can confirm whether your head shape needs a different interior.
Step 3: Check for reversed or incorrectly snapped pads
Some pads are shaped to fit only one side. If a pad is reversed, it may snap in but sit at the wrong angle, creating a gap or a pressure point. Check the maker's diagram for your model and confirm each pad is on the correct side and oriented correctly. A pad that snaps in easily but feels wrong is a common sign of a reversed or wrong-model pad.
Step 4: Give new pads time to settle, but set a limit
New pads often feel tight at first and compress slightly over the first few rides. That settling is normal. What is not normal is a pad that starts loose or a pressure point that gets sharper over time. A practical rule: if a pressure point is still sharp after a few short rides, change the pad thickness rather than waiting for it to break in.
Step 5: Know when to stop adjusting
Stop swapping pads and reassess the helmet if:
- The helmet still rotates or lifts after you have tried the correct thicker pad set.
- One side stays loose after reseating and confirming matched pads.
- You feel numbness, sharp pressure, or jaw pain that does not ease after a few minutes.
In those cases, the helmet may not match your head shape, or it may need replacement.
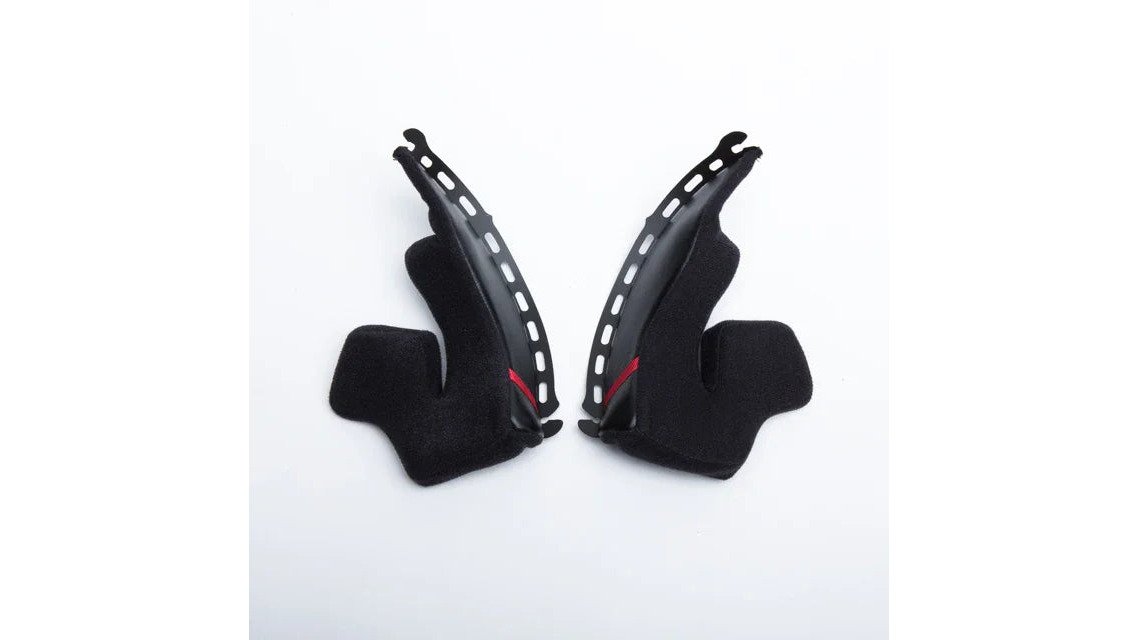
The RF1400 Cheek Pad Set is made from soft, moisture-wicking material and comes in different thickness options. It is easy to remove and replace if you need to adjust the fit.
The article breaks the likely causes of uneven or loose cheek pads into four problems, each with a quick check.
| Problem | Cause | Fix |
|---|---|---|
| Pad sits higher than the other | Pad not fully seated, or a bent tab or torn snap | Reseat both pads until every snap clicks; replace a damaged pad |
| Pad feels wrong or creates a gap | Reversed pad or wrong model for your helmet | Check the maker's diagram and confirm side and orientation |
| Helmet still loose at lower face | Pads too thin for your face | Try a thicker pad set |
| Helmet moves at brow, tips or lifts at back | Shell is too large for your head | Thicker pads won't fix it; compare shell sizes or interior shapes |
| Pressure point gets sharper over time | Pad not suited to your face, not normal break-in | Change pad thickness rather than waiting |
How to Replace Motorcycle Helmet Cheek Pads
Replace cheek pads when they flatten, tear, or stop holding their shape. Worn pads lose their grip and change how the helmet fits.
Steps:
- Remove the old pads by unsnapping or unhooking them from the shell.
- Check the new pads against your helmet model and thickness options.
- Attach the new pads and press them until the fasteners lock.
- Run the fit test again before riding.
- Keep pads clean by removing and washing them as the maker allows.
- Always confirm the pads fit your exact helmet model.
The TYPE-I Cheek Pad is available in different thickness options and is easy to remove and replace. For other helmets, browse the Helmet Cheek Pads range.
Booking a Fit Check Before You Ride: Your Next Step
If the cheek pads still feel wrong after you try these steps, consider getting a professional fit check, since a fitter can compare your head shape and the helmet together.
Shoei helmets are one of the brands available if you want to compare shell shapes. Browse the Shoei Helmets range on our site.
Frequently Asked Questions
How tight should helmet cheek pads be?
Cheek pads should feel snug and press evenly against your cheeks when the helmet is buckled, without causing sharp pain or cutting off comfort. You should feel gentle, consistent contact across the cheeks and jaw. If the helmet stays put when you shake your head side to side but you can still open your mouth comfortably, the cheek pad fit is usually in a good range. Recheck after a few rides, because new foam often feels firmer and settles slightly with use.
Should a motorcycle helmet squeeze your cheeks?
Some firm contact is normal and expected, since the cheek pads are what hold the helmet against your face. A helmet should not create constant pain, numbness, or pressure that builds over time. If the pressure is strong enough to cause headaches or leave marks that last well after you take the helmet off, the cheek pads are likely too thick for your face shape, and you should try a thinner set or have the fit reviewed before riding again.
Can you replace helmet cheek pads to improve fit?
Yes. Many helmets, including Shoei and Arai models, use removable cheek pads available in different thicknesses. The RF1400 Cheek Pad Set at $64.99, the RF-SR Cheek Pad at $59.99, and the ARAI Regent-X Cheek Pads at $36.95 are examples of replacement options on The Helmet Shop. Confirm the pad matches your exact helmet model before ordering, since pad fit varies by shell.
How do you check whether a helmet moves too much on your head?
Buckle the helmet, then grip the shell with both hands and try to rotate it forward, backward, and side to side. If the helmet shifts noticeably on your head or your skin moves with it, the fit is too loose. Good fit means the helmet stays in place without your head feeling squeezed. Check this with the chin strap fastened and the helmet in its normal riding position.


